Follow Me On Social Media!

Cassava Flour Pie Crust: Easy, Delicious & Gluten-Free Delight
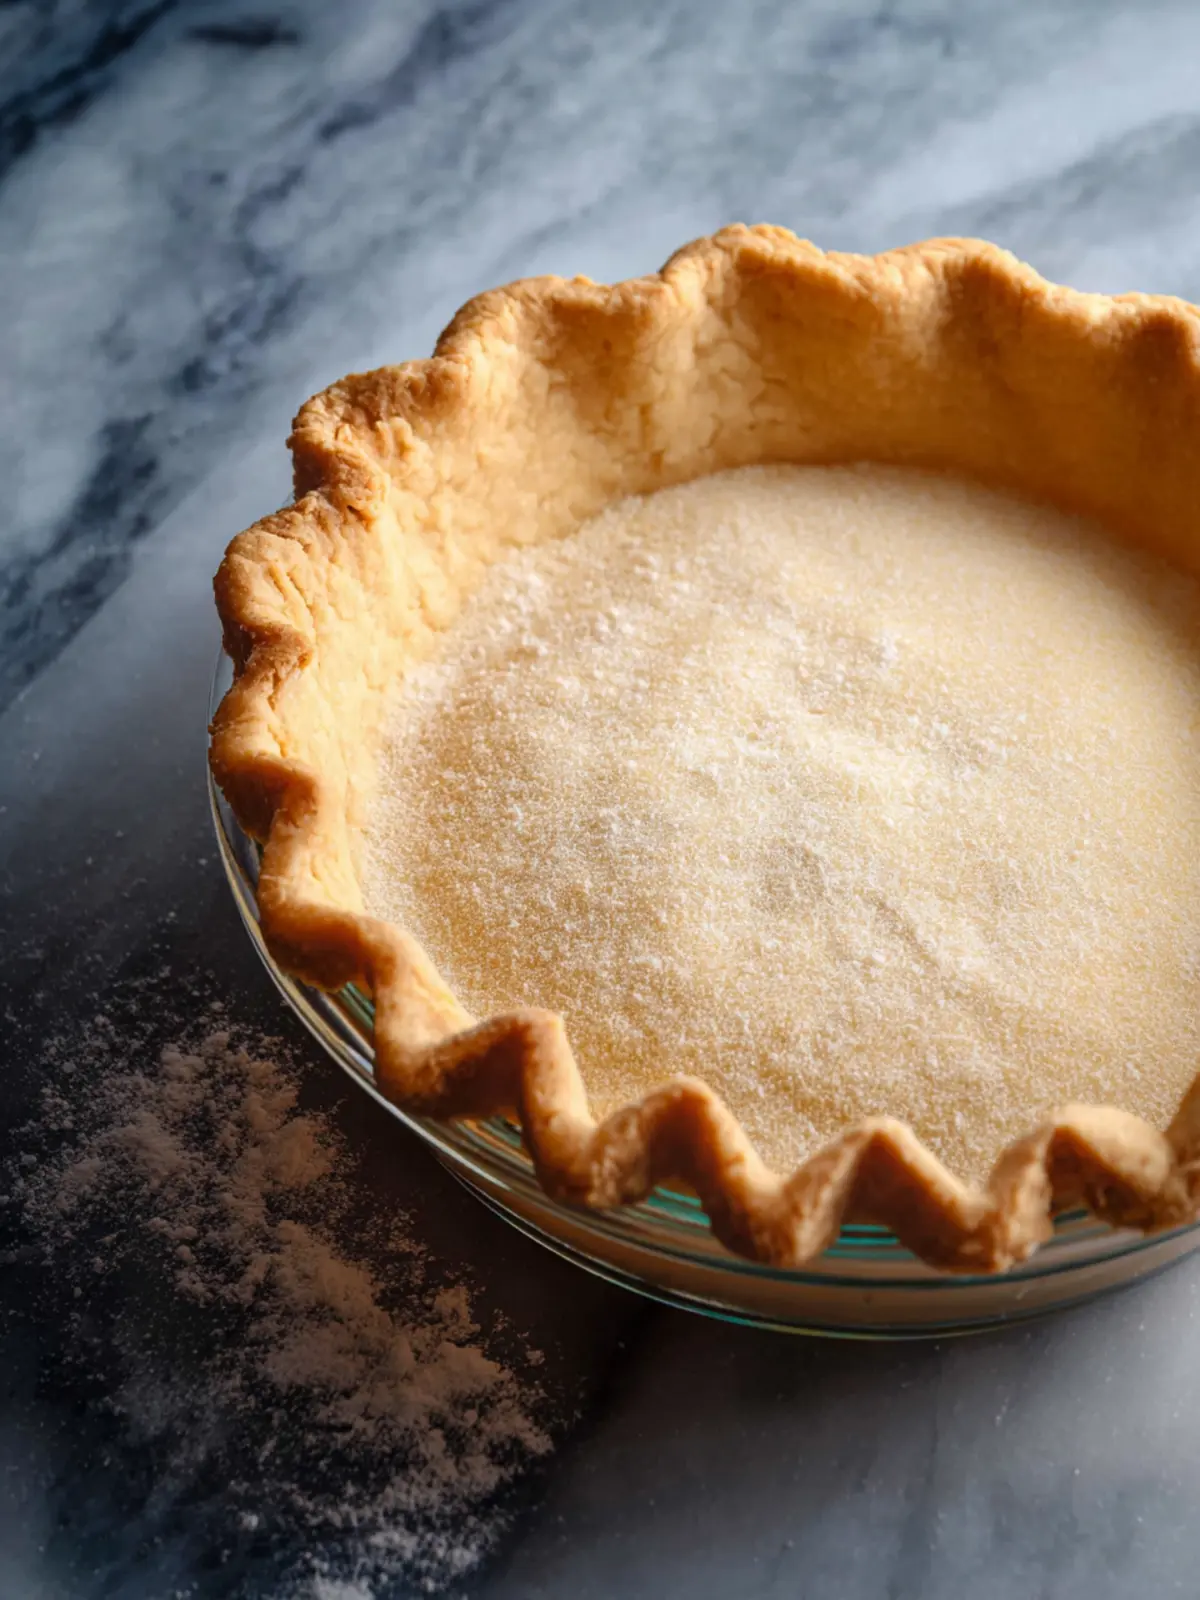
Introduction to Cassava Flour Pie Crust
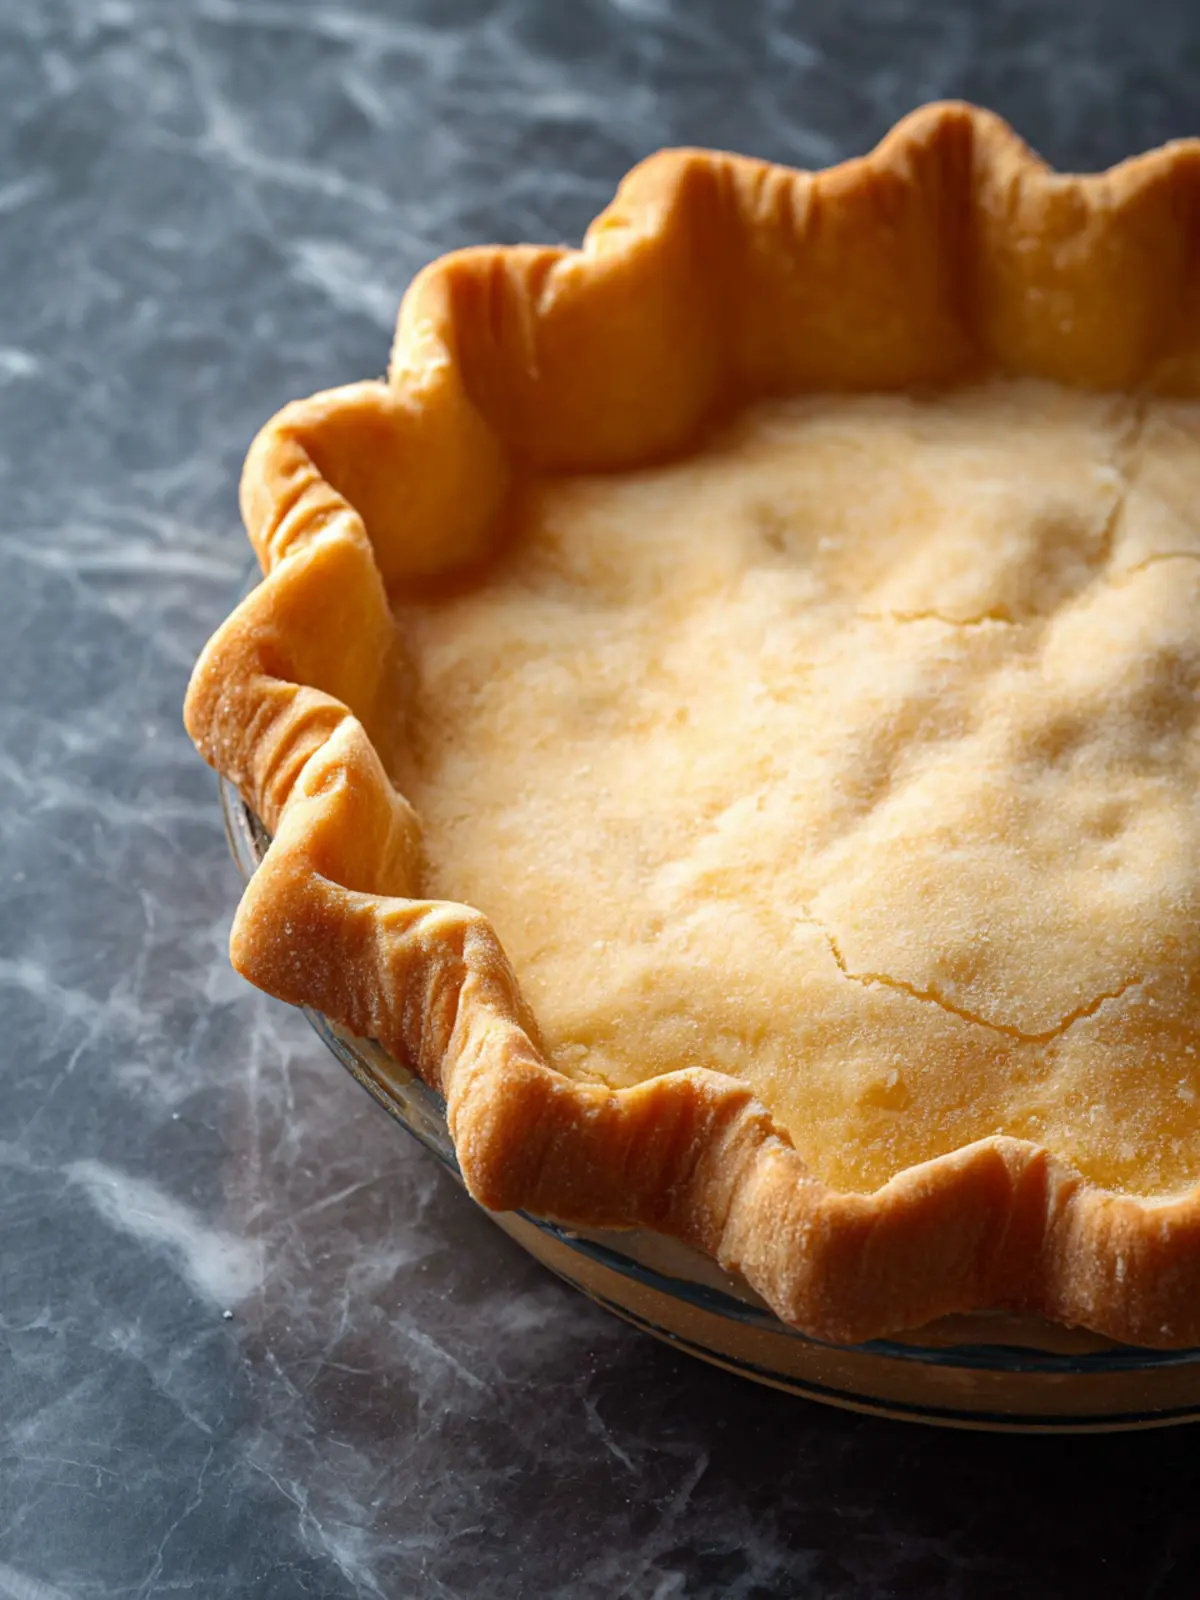
Picture this: a warm, golden-brown pie crust that crumbles just perfectly at the touch, enveloping your favorite fillings. This dream can become a reality with a cassava flour pie crust. Cassava flour, a popular gluten-free alternative, has been gaining momentum among food enthusiasts for its versatility and unique flavor profile. Unlike traditional wheat flour, this not-so-humble root vegetable flour offers a nutty sweetness that enhances your baking projects, making it a fantastic choice for any pie lover eager to create something special.
What makes cassava flour pie crust a fantastic choice? First off, it’s a gluten-free option that’s genuinely delicious, allowing folks with dietary restrictions to indulge without compromise. The texture is light and flaky, which means you won’t miss the gluten one bit. Additionally, cassava flour is packed with nutrients, including fiber, which helps with digestion.
-
Easy to Work With: Cassava flour is incredibly user-friendly, blending easily with other ingredients. It can be used in a variety of pie recipes, from sweet to savory, and provides a beautiful, sturdy base for your creations.
-
Natural Flavor: With its subtle nutty taste, cassava flour enhances the overall flavor of your pie without overpowering it. It pairs wonderfully with fruits, spices, or creamy fillings, making it a versatile choice for any recipe.
-
Nutritious Substitute: Besides being gluten-free, cassava flour is rich in complex carbohydrates and low in fat, making it a healthier alternative to traditional flours.
Incorporating cassava flour pie crust into your baking repertoire not only opens the door to healthier dessert options but also allows you to experiment with exciting new flavors and textures. Imagine making a vibrant fruit pie or a savory quiche, all while providing a delicious and inclusive experience for family and friends. This crust is sure to impress at your next gathering, proving that gluten-free doesn’t mean flavor-free!
Key Ingredients for Cassava Flour Pie Crust
Creating a delightful cassava flour pie crust is all about the right balance of ingredients, each contributing to a unique flavor and texture. Let’s dive into the key components that make this crust a standout.
-
Cassava Flour: The star of this recipe, cassava flour offers a wonderful gluten-free alternative that’s packed with nutrients. Its light texture makes it perfect for achieving a flaky crust that melts in your mouth.
-
Butter or Coconut Oil: I prefer using butter for that rich flavor, but coconut oil is an excellent dairy-free option. Both fats lend a delectable richness while helping the crust achieve that perfect golden-brown hue.
-
Salt: Just a pinch elevates the flavor profile, balancing the sweetness of any filling you choose.
-
Eggs: These not only bind the ingredients together but also add structure to the crust. If you’re vegan, consider using a flaxseed or chia seed egg substitute.
-
Water: This helps bring everything together. The amount can vary, so add it gradually until the dough holds together without being sticky.
With these ingredients, your cassava flour pie crust will not only hold its shape but also deliver an irresistible taste. Happy baking!
Why You’ll Love This Recipe
When you dive into the world of a cassava flour pie crust, you’re not just baking; you’re embarking on a flavorful adventure that combines nutrition and deliciousness. As someone who cherishes homemade goodness, I can assure you that making your own pie crust brings unparalleled satisfaction that pre-made versions simply can’t match.
Benefits of Making Your Own Pie Crust
Creating your own cassava flour pie crust opens the door to customization, letting you control the ingredients to cater to your taste and dietary needs. Here are a few reasons this homemade pie crust shines:
-
Healthier Ingredients: By using cassava flour, you’re opting for a gluten-free alternative that’s rich in fiber and provides essential nutrients. This is great news for those who are gluten-sensitive or following a paleo diet.
-
Freshness and Flavor: There’s something magical about the aroma of freshly baked crust wafting through your kitchen. You can taste the difference, and trust me, your friends and family will notice!
-
Creative Control: Want to add a hint of sweetness or an herbaceous twist? The freedom to experiment with flavors means you can create a crust that stands out, whether it’s sweet or savory.
By crafting your own cassava flour pie crust, you’re not just making a delightful base for your pies; you’re also nurturing a deeper connection to your food, transforming your culinary experience into something truly special.
Variations on Cassava Flour Pie Crust
Creating your own cassava flour pie crust opens up a world of delicious possibilities, whether you lean towards sweet or savory. This gluten-free option not only provides an incredible texture but also adapts beautifully to various fillable delights.
Sweet vs. Savory Fillings
When it comes to sweet fillings, think of classic desserts like lemon meringue or rich chocolate fudge. The neutral flavor of the cassava flour crust complements the sweetness perfectly, letting those fruit or chocolatey notes shine. A dash of cinnamon sugar or a sprinkle of cocoa powder in the crust can elevate your dessert a notch, infusing it with added warmth and flavor.
On the other hand, savory fillings can showcase the versatility of your cassava flour pie crust. Imagine a hearty quiche packed with your favorite vegetables and cheese—this crust holds up remarkably well, giving you a delightful crunch with every bite. Or perhaps a pot pie full of tender chicken and a savory gravy; the cassava flour adds a subtle nuttiness that enhances the entire dish.
Experimenting with various spices or herbs in your crust can take your savory pies to the next level. Trying out rosemary for a rustic touch or a hint of garlic powder can make your dish uniquely yours. So, whether sweet or savory, the adaptability of a cassava flour pie crust makes it a fantastic base for any culinary creation.
Cooking Tips and Notes for Cassava Flour Pie Crust
Creating a cassava flour pie crust is a delightful venture into gluten-free baking, and the key lies in mastering a few essential techniques. This flour, derived from the cassava root, provides a unique texture and flavor that can elevate any pie.
Essential Techniques for Dough Handling
-
Keep Everything Cold: Ensure your butter or coconut oil is well-chilled before incorporating it into the dough. Cold fats help to create a flaky texture, which is essential for a delightful cassava flour pie crust.
-
Mix Gently: When combining ingredients, mix just until everything is combined. Overmixing can make the crust tough, which is the last thing you want for a perfectly flaky pie. Think of it as a gentle embrace rather than a vigorous handshake.
-
Rest the Dough: After mixing, let the dough rest in the refrigerator for at least 30 minutes. This process allows the flour to hydrate and relax, resulting in a crust that is easier to roll out and handle.
-
Use Parchment Paper: When rolling out your dough, place it between two sheets of parchment paper. This technique prevents sticking and makes transferring the crust to the pie pan a breeze.
-
Pre-bake as Needed: Depending on your pie filling, it may help to pre-bake your crust for 10-15 minutes before adding the filling. This ensures a crispy texture and prevents a soggy bottom.
By following these tips, you’ll be well on your way to mastering the art of a delicious cassava flour pie crust that impresses your friends and family!

Serving Suggestions for Your Pie
Creating a delightful experience around your cassava flour pie crust is all about choosing the right fillings and accompaniments that bring joy to each bite. Whether you’re hosting a gathering or enjoying a cozy evening at home, there are endless possibilities to elevate your pie.
Perfect Pairings for Every Season
Choosing the right filling for your cassava flour pie crust isn’t just about personal preference; it’s about matching the flavors with the season.
-
Spring: For a refreshing touch, consider a lemon meringue pie. The tangy brightness of lemon perfectly complements the nutty flavor of the crust. Top it with light whipped cream and fresh berries for garnish.
-
Summer: Fresh fruit pies shine during the hot months. A strawberry-rhubarb filling sweetened just right will shine in your crust, with a scoop of vanilla ice cream melting over the top.
-
Autumn: Nothing beats the warmth of a spiced apple filling during fall. Add a sprinkle of cinnamon or nutmeg to enhance the cozy vibe. A dollop of whipped cream brings it all together.
-
Winter: A rich chocolate filling can turn your pie into a decadent dessert. Pair it with a sprinkle of sea salt and serve with a side of homemade peppermint ice cream for that festive flair.
Experiment with these combinations, and don’t hesitate to share your favorite flavors with friends and family. Enjoy crafting the ultimate pie experience that reflects the seasons!
Time Breakdown for Cassava Flour Pie Crust
Creating a cassava flour pie crust is not just about mixing ingredients; it’s about enjoying the process! Here’s a simple breakdown of how to organize your time for this delicious endeavor:
Preparation time
Set aside about 15 minutes to gather your ingredients and mix everything together. The beauty of cassava flour is its ease of use, making this step straightforward and enjoyable.
Chilling time
After preparing the dough, let it chill in the refrigerator for at least 30 minutes. This is crucial for achieving a tender crust that holds together beautifully when baked. It’s also a great time to sip your favorite beverage or tidy up the kitchen!
Rolling out and baking time
Finally, allocate about 15 minutes for rolling out your dough and an additional 25-30 minutes for baking. Keep an eye on it as it bakes to achieve that perfect golden-brown finish. Enjoy the delightful aroma filling your kitchen as you approach pie perfection!
Nutritional Facts for Cassava Flour Pie Crust
When it comes to enjoying a delicious cassava flour pie crust, knowing its nutritional profile can help you make conscious choices. This unique flour, derived from the cassava root, offers a nutritious alternative to traditional wheat-based crusts.
Calories
A serving of cassava flour pie crust is relatively low in calories, averaging around 200-250 calories depending on the specific ingredients you use. This makes it a great base for those mindful of caloric intake without compromising on taste.
Carbohydrates
Cassava flour pie crust is primarily composed of carbohydrates, providing about 46-50 grams per serving. These carbs come from the naturally starchy cassava root, offering a quick source of energy, which can be particularly beneficial for active individuals.
Fats
This pie crust is quite low in fats, typically containing around 5-10 grams per serving. Most of the fat comes from any added oils or butter, ensuring your crust remains flaky and satisfying while still fitting into a balanced diet.
By exploring the nutritional facts of cassava flour pie crust, you can enjoy your favorite pies guilt-free, enhancing your culinary adventures without derailing your health goals.
FAQs about Cassava Flour Pie Crust
Exploring the cassava flour pie crust can seem daunting at first, but worry not! Let’s unpack some common questions that can help you feel more confident in your baking journey.
How does cassava flour compare to regular flour?
Cassava flour is a great alternative to traditional wheat flour, especially for those avoiding gluten. It’s made from the whole cassava root, giving it a subtly nutty flavor and a texture that can closely mimic regular flour in many recipes. Unlike all-purpose flour, cassava flour is higher in carbohydrates and has a different consistency—it’s more starchy, which can result in a slightly different texture in your pie crust, but still deliciously satisfying!
Can I make this crust ahead of time?
Absolutely! A cassava flour pie crust can be made ahead and stored. After preparing the dough, wrap it tightly in plastic wrap and refrigerate it for up to three days. For longer storage, consider freezing the dough; just make sure to thaw it in the fridge a day before you plan to use it. This will allow the dough to regain its pliability.
What are the best practices for rolling out the dough?
When it comes to rolling out your cassava flour pie crust, here are a few tips:
- Flour Your Surface: Dust your countertop or rolling area with extra cassava flour to prevent sticking.
- Use Parchment Paper: Place the dough between two sheets of parchment paper, which can help you roll it out evenly and avoid extra flour.
- Work Gently: Cassava flour can be a little more fragile, so handle it delicately to maintain the structure of your crust.
These tips will ensure a smoother experience in making a delicious cassava flour pie crust!
Conclusion on Cassava Flour Pie Crust
Embracing a cassava flour pie crust in your baking repertoire opens up a world of gluten-free culinary adventures. This crust not only boasts a delightful texture but also carries a subtle nutty flavor that enhances both sweet and savory pies. Whether you’re preparing a classic fruit pie or a savory quiche, this versatile crust will not disappoint.
So, next time you’re in the kitchen, why not swap your traditional flour for cassava? You’ll create a delicious, flaky crust that suits a variety of fillings. Give it a try—your taste buds (and your friends) will thank you for it!
Print
Cassava Flour Pie Crust
- Total Time: 20 minutes
- Yield: 2 pie crusts 1x
- Diet: Gluten-Free
Description
A gluten-free pie crust made with cassava flour, perfect for any pie filling.
Ingredients
Scale
- 1 3/4 cup cassava flour (210g)
- 1/2 cup arrowroot starch (65g)
- 1 1/2 teaspoon xanthan gum (optional – see notes)
- 1 teaspoon salt
- 2 eggs, whisked
- 1/3 cup vegetable shortening or lard, chilled and diced* (75g)
- 1/3 cup cold butter, diced (75g)
- 3–5 tablespoons ice cold water
Instructions
- Whisk cassava flour, arrowroot flour, xanthan gum and salt together in a large mixing bowl.
- Make a small well in the middle of the flour. Pour the whisked eggs in the well then stir into the flour.
- Add the chilled and diced shortening and butter to the flour mixture. Mix into the flour mixture with a couple of forks or pastry cutter a sandy kind of mixture.
- Add the ice cold water, 1 tablespoon at a time. Mix in between each addition of water. Keep adding water and mixing until the dough comes together.
- Divide dough in half (each half weighing about 310g). Form each half into disc shape. Wrap tightly in plastic wrap and refrigerate the dough for at least 20 minutes and up to 5 days.
- Lay out a large piece of parchment paper or silicon baking mat. Lightly dust your hands, the work surface and rolling pin with flour.
- Place one half of the dough in the middle and begin rolling it out. Sprinkle over a little more flour as you go if it starts to stick to the rolling pin. Every so often flip the dough over to make sure it’s not sticking to the paper. Roll into a circular shape that is at least 12 inches in diameter to easily fit a 9-inch pie plate. It will be about 1/8 inch/ a little over 3 mm thick.
- Use the parchment paper to transfer your dough to the pie dish. Slip one hand under paper to gently lift and flip the dough over into the pan.
- Peel back the paper and sooth over any cracks or breaking points in the dough. Use the dough hanging over the edges of the pie dish to cover up the holes in the middle. Crimp the edges of the dough as you like.
- Proceed with the pie according to your recipes instructions.
Notes
- The xanthan gum is optional but recommended for better texture.
- You can refrigerate the dough for up to 5 days or freeze it for longer storage.
- Prep Time: 20 minutes
- Cook Time: 0 minutes
- Category: Dessert
- Method: Baking
- Cuisine: American
Nutrition
- Serving Size: 1 slice
- Calories: 200
- Sugar: 1g
- Sodium: 200mg
- Fat: 15g
- Saturated Fat: 7g
- Unsaturated Fat: 5g
- Trans Fat: 0g
- Carbohydrates: 22g
- Fiber: 2g
- Protein: 2g
- Cholesterol: 70mg